Ceiling Repairs – How to Spot Problems Before They Destroy Your Home

Keeping the interior ceiling in good condition is important for maintaining the structure and aesthetic of a room. Regular inspections can help to spot potential problems before they become serious issues.

Ceiling Repairs

Water damage in the ceiling is a common issue that can lead to mold growth and structural problems. Replacing damaged materials and addressing underlying moisture problems can help to resolve these issues. Reach out to Ceiling Repairs Perth for expert assistance.

When water damage occurs to your ceiling, it must be addressed quickly to prevent mold growth and structural problems. The first step is to find the source of the leak. This may include a clogged gutter, roof damage, fire sprinklers, or condensation from your AC unit. Once the issue is resolved, you can focus on repairing the ceiling.

Drying the area is also important to avoid microbial problems. Using fans and dehumidifiers will help speed up the process. It is recommended that you use a moisture meter to ensure that the drywall is dry before starting repairs. Once the drywall is dry, it is important to make sure that you paint it with a water-resistant primer. This will protect your ceiling from future water damage.

If the hole is large, you should cover it with a piece of drywall cut to fit the area. This will create a smooth transition and ensure that the patch is sturdy. Next, you should fill the hole with setting-type joint compound. Make sure to smooth the compound well, as this will help it blend with the surrounding drywall.

Water damage to a ceiling can be costly, especially if it is not repaired promptly and properly. This can lead to mold growth and severe structural damage. Regular inspections and identifying issues early can help you control your repair costs.

While you can repair a small hole or crack in your ceiling yourself, it’s best to hire a professional for larger repairs or water-damaged ceilings. Professionals can offer a more accurate estimate per square foot and repair the root cause of the damage. Plus, they can do the job in a much faster and more efficient manner than a DIYer.

Cracks

Cracks in the ceiling are a common occurrence and they come in many shapes, lengths and depths. Some are cosmetic in nature and not indicative of structural damage while others could be serious and warrant immediate attention. Differentiating between these types of cracks is essential as ignoring them could lead to further issues like mold growth or even collapse of the ceiling itself.

If the cracks are fine and straight, they may be due to natural home settling and should be monitored but not necessarily repaired immediately. However, if they extend down the walls, it’s likely an indication of structural damage and should be examined by a professional. Also, if the cracks are paired with a sagging ceiling they should be considered an emergency and addressed right away.

Water leaks are another common cause of ceiling cracks and should be dealt with as soon as they occur. Water damage can not only cause unsightly staining but it can weaken the drywall and potentially compromise the structure of the ceiling. In addition, prolonged water exposure can foster mold growth, posing health risks to the home’s inhabitants.

Once the joint compound has dried, gently sand the area to make it smooth and flush with the rest of the ceiling. Wipe any dust off the sanded surface and apply a coat of primer to help the paint adhere properly. Allow the primer to dry before applying the ceiling paint, using a roller for larger areas and a brush for edges and corners. Ensure that the color of the paint matches that of the rest of the room to avoid showing a patched area. If the drywall is covered with insulation, you’ll need to remove it before beginning.

Popcorn Ceiling

Popcorn ceilings, known for their bumpy texture, were popular in homes built before the 1990s. This textured finish was a quick and inexpensive way to make drywall ceilings look nice, but it has some drawbacks, including sagging and cracking.

Because of their clumped texture, popcorn ceilings can be difficult to clean and maintain. Dust, cobwebs, and stains can easily get trapped in the raised bumps of the texture. These textured surfaces can also cause health problems for people with asthma or other respiratory conditions, as the accumulated dust can aggravate their symptoms.

Despite these problems, popcorn ceilings can still be repaired and restored. When a crack or sag in the ceiling becomes noticeable, it is best to hire a professional to address the issue. Depending on the cause, the repair process may involve patching and painting, or it may need to be replaced or removed completely.

If the sag in the ceiling is caused by structural issues, like damaged joists or trusses, a professional needs to inspect and repair the damage. If the crack is cosmetic, it can usually be fixed by applying joint compound and taping the seams, sanding it down once dry, then priming and painting.

It’s important to properly prepare the work area before beginning a popcorn ceiling removal project. This will help ensure a successful result and prevent unnecessary expenses down the road. Cover all items on the furniture, and secure any valuables that can’t be moved to a safe location. Then, protect yourself with safety goggles and a mask or respirator. Finally, set up a drop cloth to avoid potential spills and debris. If your house is still inhabited, it’s a good idea to ask a professional about whether or not the ceiling contains asbestos and if it would be safer to leave it alone.
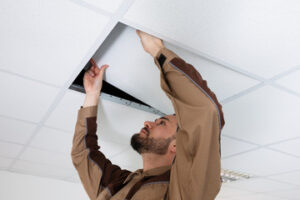
Tiles

While ceiling tiles are a low maintenance and long lasting addition to your home, they can be damaged from impact above or from moisture infiltration. It’s important to check the condition of your ceiling tiles frequently and address minor issues promptly, to prevent further damage.

Typically, discoloration or warping of your ceiling tile is caused by water infiltration. If your ceiling tiles have a dark color naturally, the appearance of water staining on them may be interpreted as “tile mold.” A professional assessment by a water damage expert can help you determine the extent of the moisture problem, whether it’s causing structural issues, and if the underlying insulation is affected.

In many cases, the problem is a plumbing leak, but if you have a multistory facility, a roof leak could be the culprit. Ceiling tiles are extremely porous, absorbing liquids and stains quickly. The stain will appear on the other side of the tile, leaving a damp-looking mark.

It’s also possible your ceiling tiles were damaged by an impact from above, causing them to sag. These can be a challenge to repair, but they can be done. Start at the closest wall and carefully remove the sagging tiles, being careful not to pull them loose from the framework beneath them. If they’re glued, use a utility knife to cut into the seams and separate them. If they’re stapled, use a staple lifter like the Arrow SL24D to easily remove the offending staples without damaging the surrounding tiles.

If you notice that a portion of your ceiling is sagging or discolored, it’s best to choose a licensed, insured and bonded ceiling contractor. They’ll be able to inspect the problem and provide a detailed, cost-effective solution.

Structural Issues

Structural problems in a ceiling should be taken seriously, and are often an indicator of a larger issue within a building or home. Depending on the severity, structural issues in the ceiling may be caused by a number of factors including foundation settling or damage from termites.

Unsightly water stains and ceiling sagging are common signs of water-related issues that should be addressed immediately to prevent further damage to the ceiling structure. Persistent leaks from faulty plumbing, roof damage or clogged gutters can cause severe structural damage over time and lead to further issues such as mold growth, health hazards and potential structural collapse.

Cracks in the ceiling are also common problems that indicate underlying issues. Hairline cracks are often cosmetic and simply require joint compound or drywall mud patching, while more significant cracks are a sign of structural damage. Cracks in the ceiling can be caused by a number of issues, from foundation settlement to temperature fluctuations that cause the structure to shift and move, causing movement or expansion in materials such as plasterboard and cornices.

Ceilings are designed to support a certain amount of weight, and shifting or sagging is often a sign that they’re being overloaded. Bathrooms are especially prone to this issue, as bathtubs and vanities place a heavy load on the ceiling that it’s not intended to support. Likewise, attics or upper-level rooms used for storage can see ceiling cracking as a result of concentrated weight distribution that stresses the framing and drywall. Ultimately, any noticeable cracks or sagging in your ceiling should be evaluated by an expert to ensure the safety and longevity of the structure. Contact a professional drywall and painting contractor to help you repair any ceiling damage or structural issues.

Things You Should Know About Window Replacement

Window Replacement Ellicott City, MD provides a great opportunity to upgrade your home’s appearance and improve its energy efficiency. But before you buy new windows, learn about the different options.

Window Replacement

The frame is the outermost part of a window, connecting it to the wall itself. It consists of the head, jambs, sill, and rails. Window frames are made from wood, aluminum, vinyl, or fiberglass. Each material has its own benefits and drawbacks, but it’s important to choose the right one for your climate. For example, wood frames are beautiful and offer favorable insulating properties, but they require more maintenance than other materials.

To determine what type of frame you need, answer a few basic questions: Is the existing window in a load-bearing wall? Are you trying to increase energy efficiency? If you answer yes to both of these, then you will need a full-frame replacement. If you answered no to either of these, an insert replacement will work just fine.

Before starting any installation, be sure to prepare your work area by cleaning the surface and removing old nails. Also, make a note of your measurements so you don’t forget them later on. Having everything ready ahead of time will save you a lot of hassle.

Next, inspect the frame for signs of damage. If you notice any rot, use a screwdriver to probe the surface of the wood. If the texture feels spongy, it’s probably rotting and should be replaced.

Once you’ve cleaned the area, apply a layer of protective tape to the entire window frame. This will keep moisture and other debris from damaging the new installation. Be sure to leave a little bit of an overlap between the protective tape and the casing for better coverage.

If you’re unsure what type of frame to choose, consider a composite window. These windows have a wood core wrapped in aluminum or vinyl for added strength and insulation. They are a good choice for homes in harsh climates, as they can withstand rain and snow. They are also more expensive than other types of frames, but you will get your money’s worth as they last for up to 80 years.

Glass

A window is more than just a hole in the wall, it allows us to see the world outside our home and lets in sunlight and air. However, windows are susceptible to damage from things like weather and shattered glass. Window glass is an important part of any house, so if it breaks, it needs to be replaced as soon as possible. Window replacement can be expensive, but you don’t have to replace the entire window frame if just one pane is broken. Instead, you can replace just the glass with a new single or double pane.

To begin the process, first remove the window sash by lifting and pulling it from the bottom. Then, clean the existing caulk from around the edge of the rabbet with a wire brush or rag and scrape away any loose paint. Next, measure the width and height of the opening to determine how much window glass you need. Once you have the measurements, order the window glass from a hardware or home improvement store.

When installing the new glass, apply a thin layer of glazing compound to the rabbet to bed the glass. Be sure to use a putty knife to press the compound against the glass. Then, use a cloth to smooth the glass and make sure there are no gaps or cracks.

Often, old double or triple pane windows develop issues with condensation between the glass panes. This is due to a cracked seal, which allows the insulating gasses in between the panes to escape and degrade over time. These problems can be resolved with a simple repair conducted by a professional.

Another common issue with older double or triple pane windows is the appearance of fogginess or streaking between the windowpanes. This is caused by the low-e coatings in the panes, which are oxidizing and losing their effectiveness. These coatings can be restored with a glass-only repair, which is less expensive than replacing the entire window.

Weatherstripping

One of the simplest and most effective do-it-yourself tasks to improve energy efficiency is replacing old weather stripping. This simple task plugs air leaks, reduces drafts, and blocks unwanted noise. It also helps ensure that your windows and doors seal tightly, preventing moisture from entering the home.

Several different types of weatherstripping are available, each with its own unique advantages and considerations. Felt weather strips, for example, are cheap and readily available, but they don’t block air flow very well, and they’re susceptible to moisture and dirt. Vinyl and metal options are more expensive but last longer and resist moisture. Tubular weatherstripping is another high-performance option that uses narrow sponge rubber or vinyl tubes attached to a wood or metal mounting strip. Some versions of this weatherstripping are inserted into milled grooves for a sleek appearance.

To replace old weather stripping, first remove any existing stripping with a utility knife or shears, then clean the area thoroughly with soapy water. Dry it completely with a rag or towel. Next, use a tape measure to size your new stripping. When cutting, make sure to leave about an inch of extra length so you can fine-tune the fit later. For adhesive-backed types, peel and stick the strips along the door or window frame. For nail-in types, secure them with finishing nails every few inches. For double-hung windows, apply V strip or foam tape around the frames where the sashes meet each other.

To test the effectiveness of your new weather stripping, have someone close the door and shine a flashlight outside. If light is visible anywhere, the door doesn’t have an adequate seal and needs more weatherstripping. This test is best done at night, so recruit a willing friend or family member and bribe them with wine if necessary!

Seals

Window seals are crucial to your home’s comfort and energy efficiency. They prevent air and water leaks and help reduce drafts. They also protect the frame and glass from moisture, rust, and mold. However, over time they can become damaged or worn out. In some cases, repair may be possible, but in other cases it is best to replace the seals. This can be done by a professional.

Whether the seals are made of rubber, plastic, metal, or a bonded combination, they need to be properly cared for to extend their lifespan. One way to do this is to follow the manufacturer’s care instructions. These often go sailing into wastebaskets unread, but they can help prolong the life of a window seal and keep it functioning optimally. Other ways to protect your window seals include avoiding harsh cleaners and excessive pressure on the windows.

If your window seals are damaged or have failed, it is likely best to replace them. This can be done by a professional, but it is also something homeowners can do on their own. If you are planning on doing this yourself, make sure to choose a day with little to no rain expected. It will be difficult to do the job without having large amounts of rain running into your home. It is also a good idea to wear the appropriate PPE (personal protective equipment) when working on the window.

When replacing the seals, you will need to remove the old caulk or sealant first. Using a sharp blade or a razor knife, cut away the excess caulk or sealant from around the edges of the window frame and the sill. Next, remove the old rubber seal from the grooves in the window frame by pinching a part of it and pulling it away from the window. This process will be repeated for all four sides of the window. Once the seals are removed, clean off any residue left behind with a damp cloth.

If you’re unsure whether your window seals are still functioning correctly, talk to a trusted window installation company near you. They can assess the situation and help you determine if repair or replacement is the best option for your home.

The Advantages of Choosing Custom Blinds and Shades

Anyone who has ever owned a rental or starter home may be familiar with basic white aluminum blinds and the like. However, window treatments come in a huge range of materials, styles, and textures.

Blinds

Traditionally, ordering custom blinds required heading to a home improvement store or specialty window covering center to speak with a design consultant and wait weeks for delivery. But now, a whole new world is open to homeowners looking for more style and functionality in their window treatments. Contact Custom Blinds And Shades KY for professional help.

Unlike off-the-shelf blinds that are designed to be used in many homes, custom shades can be assembled with the exact measurements of your windows. This ensures they fit perfectly and can be made to manage light, protect privacy, and increase insulating power more effectively.

Custom blinds offer a wide range of design options and colors to match your home’s decor. They also provide precise control over how much light enters the room through easy-to-operate slats that open or close to let in the sunlight. Some window blinds even offer energy efficiency and sound-blocking properties.

Shades can be fabricated in a range of fabrics from lightweight, eco-friendly materials to rich, elegant silks. There are also a number of styles to choose from, such as bamboo and woven wood, pleated shades that feature crisp, even folds for an attractive, modern look, and roller shades that neatly roll up and down on a smooth track. Shades are also available with the added convenience of motorization and can be programmed into your Smart Home hub to open, close, and adjust at specific times throughout the day and night.

When choosing a shade, consider the level of protection you need from the sun’s harsh UV rays. Many shades are available in fabric that’s infused with sun-protective chemicals to block the sun’s harmful rays and reduce fading over time. Other shade fabrics are anti-bacterial and odor-neutralizing to help maintain a fresh, clean living space.

Another factor to consider is how often you’ll need to clean your shade. Depending on how much traffic the area gets and how much dust, dirt or pet hair accumulates, your shade may need to be washed, cleaned with a vacuum’s brush attachment, or professionally deep cleaned.

Another advantage of custom window shades is that they can be made to accommodate any specialty window sizes, such as arches, circles, or angled windows. They can be fabricated to fit these unique window shapes, and they’ll look just as beautiful as the standard window shades that are sold in stores and online. They’ll also be more durable and last longer than standard, ready-made window blinds.

Material

Blinds and shades serve the same basic function, but differ in terms of style and material. Blinds feature slats that can be tilted open or closed and are available in many different materials, from wood to faux wood to aluminum. Shades, on the other hand, are made of a single piece of fabric that can be opened or closed and come in several styles. Shades can be opaque (blackout) or more transparent (light filtering).

The quality of your window treatments determines how long they last and how well they manage light, privacy, and energy efficiency. Unlike ready-made blinds that are usually produced in large overseas factories with minimal quality control, custom window blinds are made to your specific window size and shape, providing a perfect fit with no gaps or holes for light to seep through. The slats also stay in better shape and you don’t have to worry about broken or misaligned slats, which can happen with off-the-shelf blinds.

Choosing the right color and texture for your window coverings is another way to add a personal touch to your space. Most people think of white or off-white for their blinds, but there’s a whole world of colors and textiles to choose from. From woven grass shades that bring a natural element to your living room to cellular shades in a playful color for your child’s bedroom, there’s something to fit every aesthetic.

Consider the amount of traffic in your home and whether or not you want to keep your window treatments out of reach of children or pets. Are you looking for a more minimalist design or do you want to create a cozy retreat? Then a soft, light-filtering shade would be your best choice. Alternatively, you could choose a hard-style shade that matches the other elements and hardware in your room for a cohesive look. Depending on your priorities, there are also options for reversible shades that offer two different color sides to suit the mood or season of your room. This can be especially helpful if you have a multipurpose room that can be transformed for multiple purposes throughout the year.

Style

Custom blinds and shades are designed to fit your windows perfectly. This ensures that they’ll have a polished look and will function well for longer than ready-made options. It also means that you won’t have to deal with issues like broken slats or faulty cords.

Ready-made window treatments are made in large factories overseas with minimal quality control. The focus is on keeping costs down and profits up, so they’re usually less robust than custom options. They’ll also need to be replaced sooner than custom blinds because they are manufactured before you order them.

With custom blinds, you’re able to choose from a wide selection of colors and styles, so you can match them to your home’s decor and the functional requirements of each room. For example, if you have kids or pets, you’ll want to select durable coverings that will stand up to heavy foot traffic and spills. Shades are a great choice because they’re generally easy to clean and can be dusted with a brush attachment or gentle spot-clean.

Blinds and shades are available in a variety of color, texture, fabric, and finish choices to complement any room and style. From a sleek, modern aluminum mini blind in your minimalist living space to a luxurious natural wood blind in the dining room, there’s something to suit every taste and budget. You can even opt for a cellular shade in a playful color that matches your child’s bedroom, or add tassels and colorful fabric tapes to your woven grass shades to give them an extra pop of personality.

Whether you’re choosing a slatted blind to let in light, or a sheer to filter it, there are plenty of customization options to make your shades uniquely yours. You can even opt for a dual shade that alternates opaque and sheer bands to provide privacy and light control.

When you choose custom blinds, you’ll have the option to work with an in-house installer or an independent contractor (often through a big-box retailer acting as a middleman). At Stoneside, we offer a professional installation service to make sure your new blinds are installed to your complete satisfaction.

Installation

There are lots of reasons to choose shades and blinds over other window treatments, including their ability to manage natural light more efficiently, offer greater privacy, and even help regulate indoor temperatures. But they’re also great decorative options that add texture, color, and interest to a space.

Unlike drapes, which hang down from a rod, shades sit atop a window casing. Depending on the style you choose, this can provide an entirely different look and feel to a room.

To install a new shade or blind, start by measuring your window casing for size. Make sure to measure from the edge of the casing inward, and add a few extra inches for proper sizing. Then, use your measuring implements to determine the width of your window opening and purchase a shade that’s slightly smaller. This ensures the blind will fit perfectly, and doesn’t stick out too far or sit too close to the frame.

After obtaining your window measurements, shop for the best quality custom blinds and shades. Aside from being more affordable than ready-made versions, custom blinds offer superior durability, will perfectly fit your windows, and come in a wide range of styles and materials. Plus, if you have kids or pets, they’re easier to clean than drapes, which often require professional cleaning.

Once your new window treatments arrive, unpack them and examine the box contents to ensure all parts are included, along with product instructions. Once you’re confident everything is there, prepare to install by pre-drilling your screws or nails (or putting in place any necessary hardware). If you’re installing an inside mount, you’ll then screw or nail the mounting bracket into the window casing using the marks you made earlier. For outside mounts, you’ll then simply snap the headrail of your new shade or blind into the mounted bracket.

If you’re shopping for a new set of ready-made blinds, keep in mind that it may take weeks or even months for a local big-box retailer to order and deliver them, especially if they don’t have the specific item you need in stock. When you purchase from a company like Stoneside, however, you can be assured of timely delivery and attentive installation that will leave your home looking its best.